Video
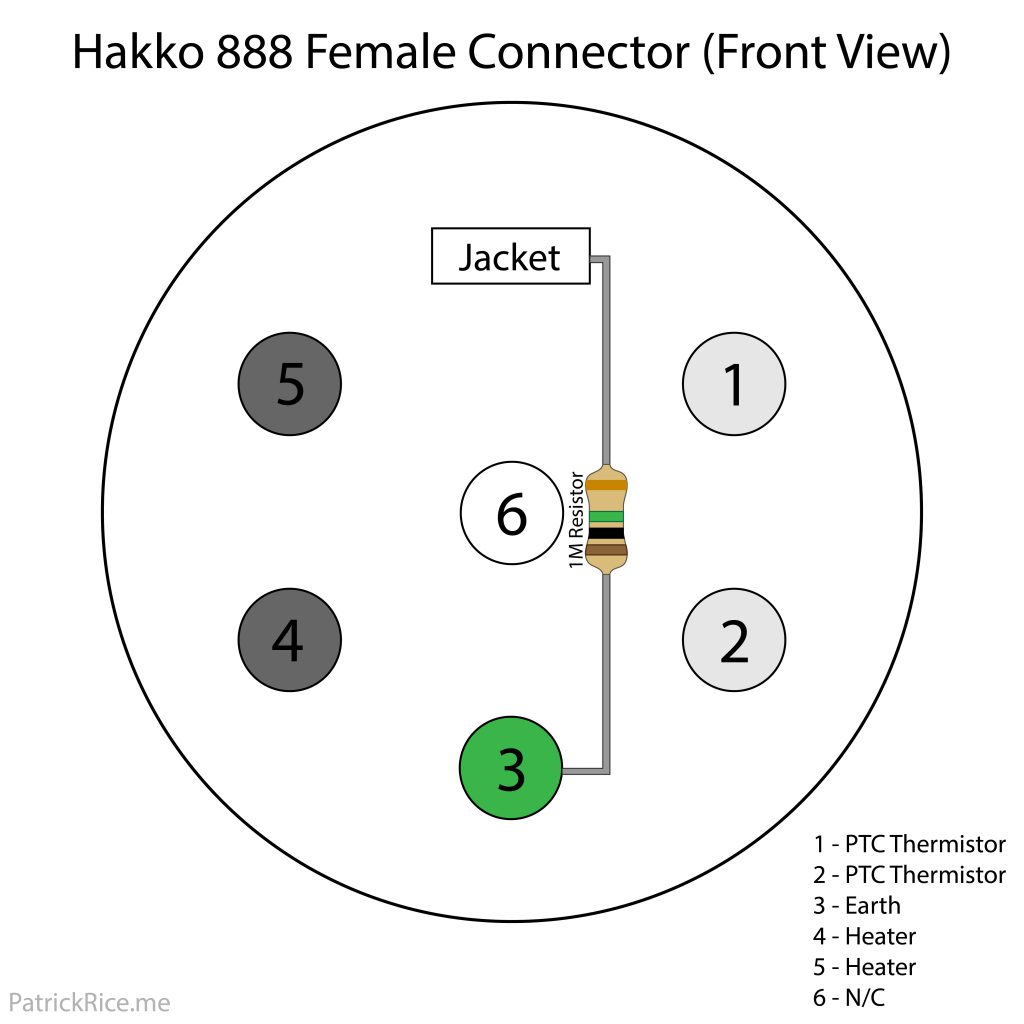
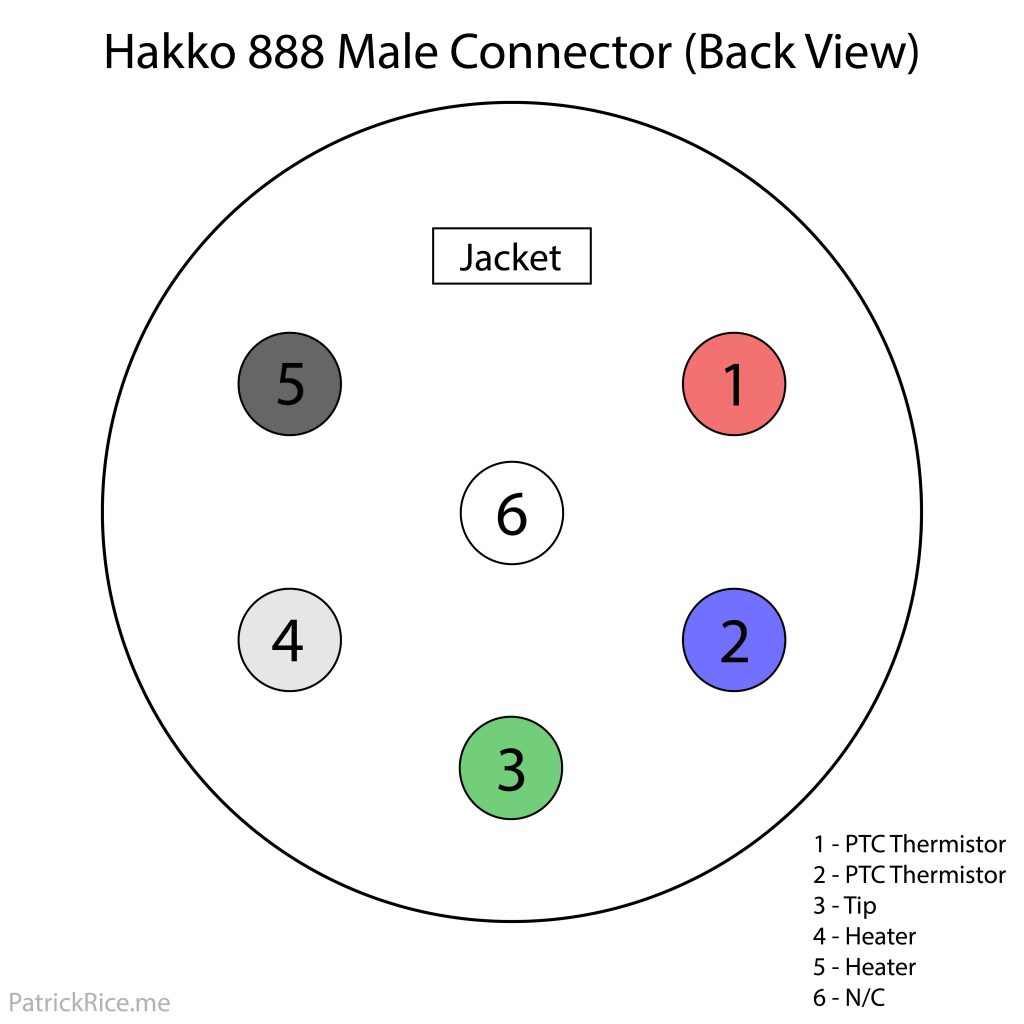
Hakko 888 soldering iron connector diagrams


Script
Welcome to my channel. Today I am going to talk about replacing an intermittent connector on the Hakko 888 soldering iron. Just about every time when I would use the iron, the tip would not heat up unless I messed with the connector on the front of the iron. There had to a better connector to replace the standard one shipped with the soldering iron.
After measuring the connector diameter, length, and pin count, I looked on Digikey to find a replacement connector. The connector used is a standard connector called a DIN connector. More specifically, this soldering iron uses a DIN-6 connector, meaning that there are 6 “positions” (pins) belonging to the connector.
The connector I found that was compatible is the SD-60LP (male) and SD-60LS (female) connector. This connector is an interlocking metal connector with extremely solid build quality. A downside with this connector is that it can rotate in the housing if the nut is not tight. This is due to the lack of a key present in the original connector.
First I removed the connector from the soldering iron by prying the corner. This allowed me to mark the wires and desolder the old connector with an old weller plug-in-the-wall iron.
I then disassembled the case of the Hakko. I attached the wires to the new connector and soldered the wires following a wiring diagram I made. After tightening up the nut to secure the new connector, I reassembled the housing.
Now on the wire connector. I desoldered the original connector after creating a wiring diagram. Stripping the casing and the wiring. I soldered the new connector. [Pause video] before the new connector is soldered on remember to put the casing of the new connector onto the cable. I forgot to do it in this scene and had to unsolder the connector, put the casing onto the cable, and then resolder the wires onto the connector. A major pain.
After assembling the connector with the casing, I mated the connectors together for the first time. It looks like I have to tighten up the nut because the connector spun a bit when tightening it up. It looks like the new connector has a solid connection — no intermittent contact at all when wiggling the connection.
So that completes this video. I hope that this will help when replacing a broken or intermittent connector on a Hakko 888 soldering iron. Links will be in the description for the connectors used in this video. Also, I will post a wiring diagram to my website, also in the description.
